Pom pom ballerina

I am a Pinterest-addict!
More and more things I see I want to try myself. Some fail. Some don’t.
It’s all about the fun of reproducing what you see.
And in this case, without any tutorial.
Just from this picture:
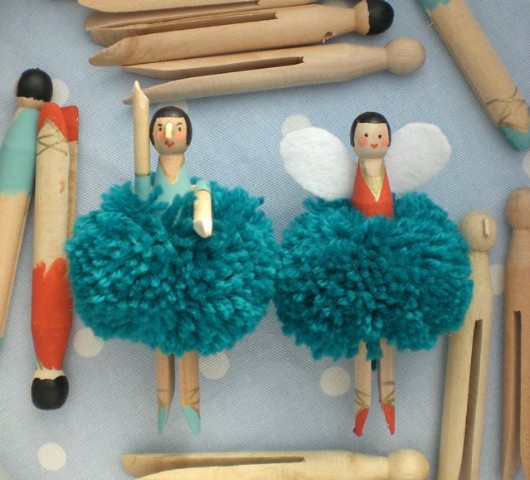
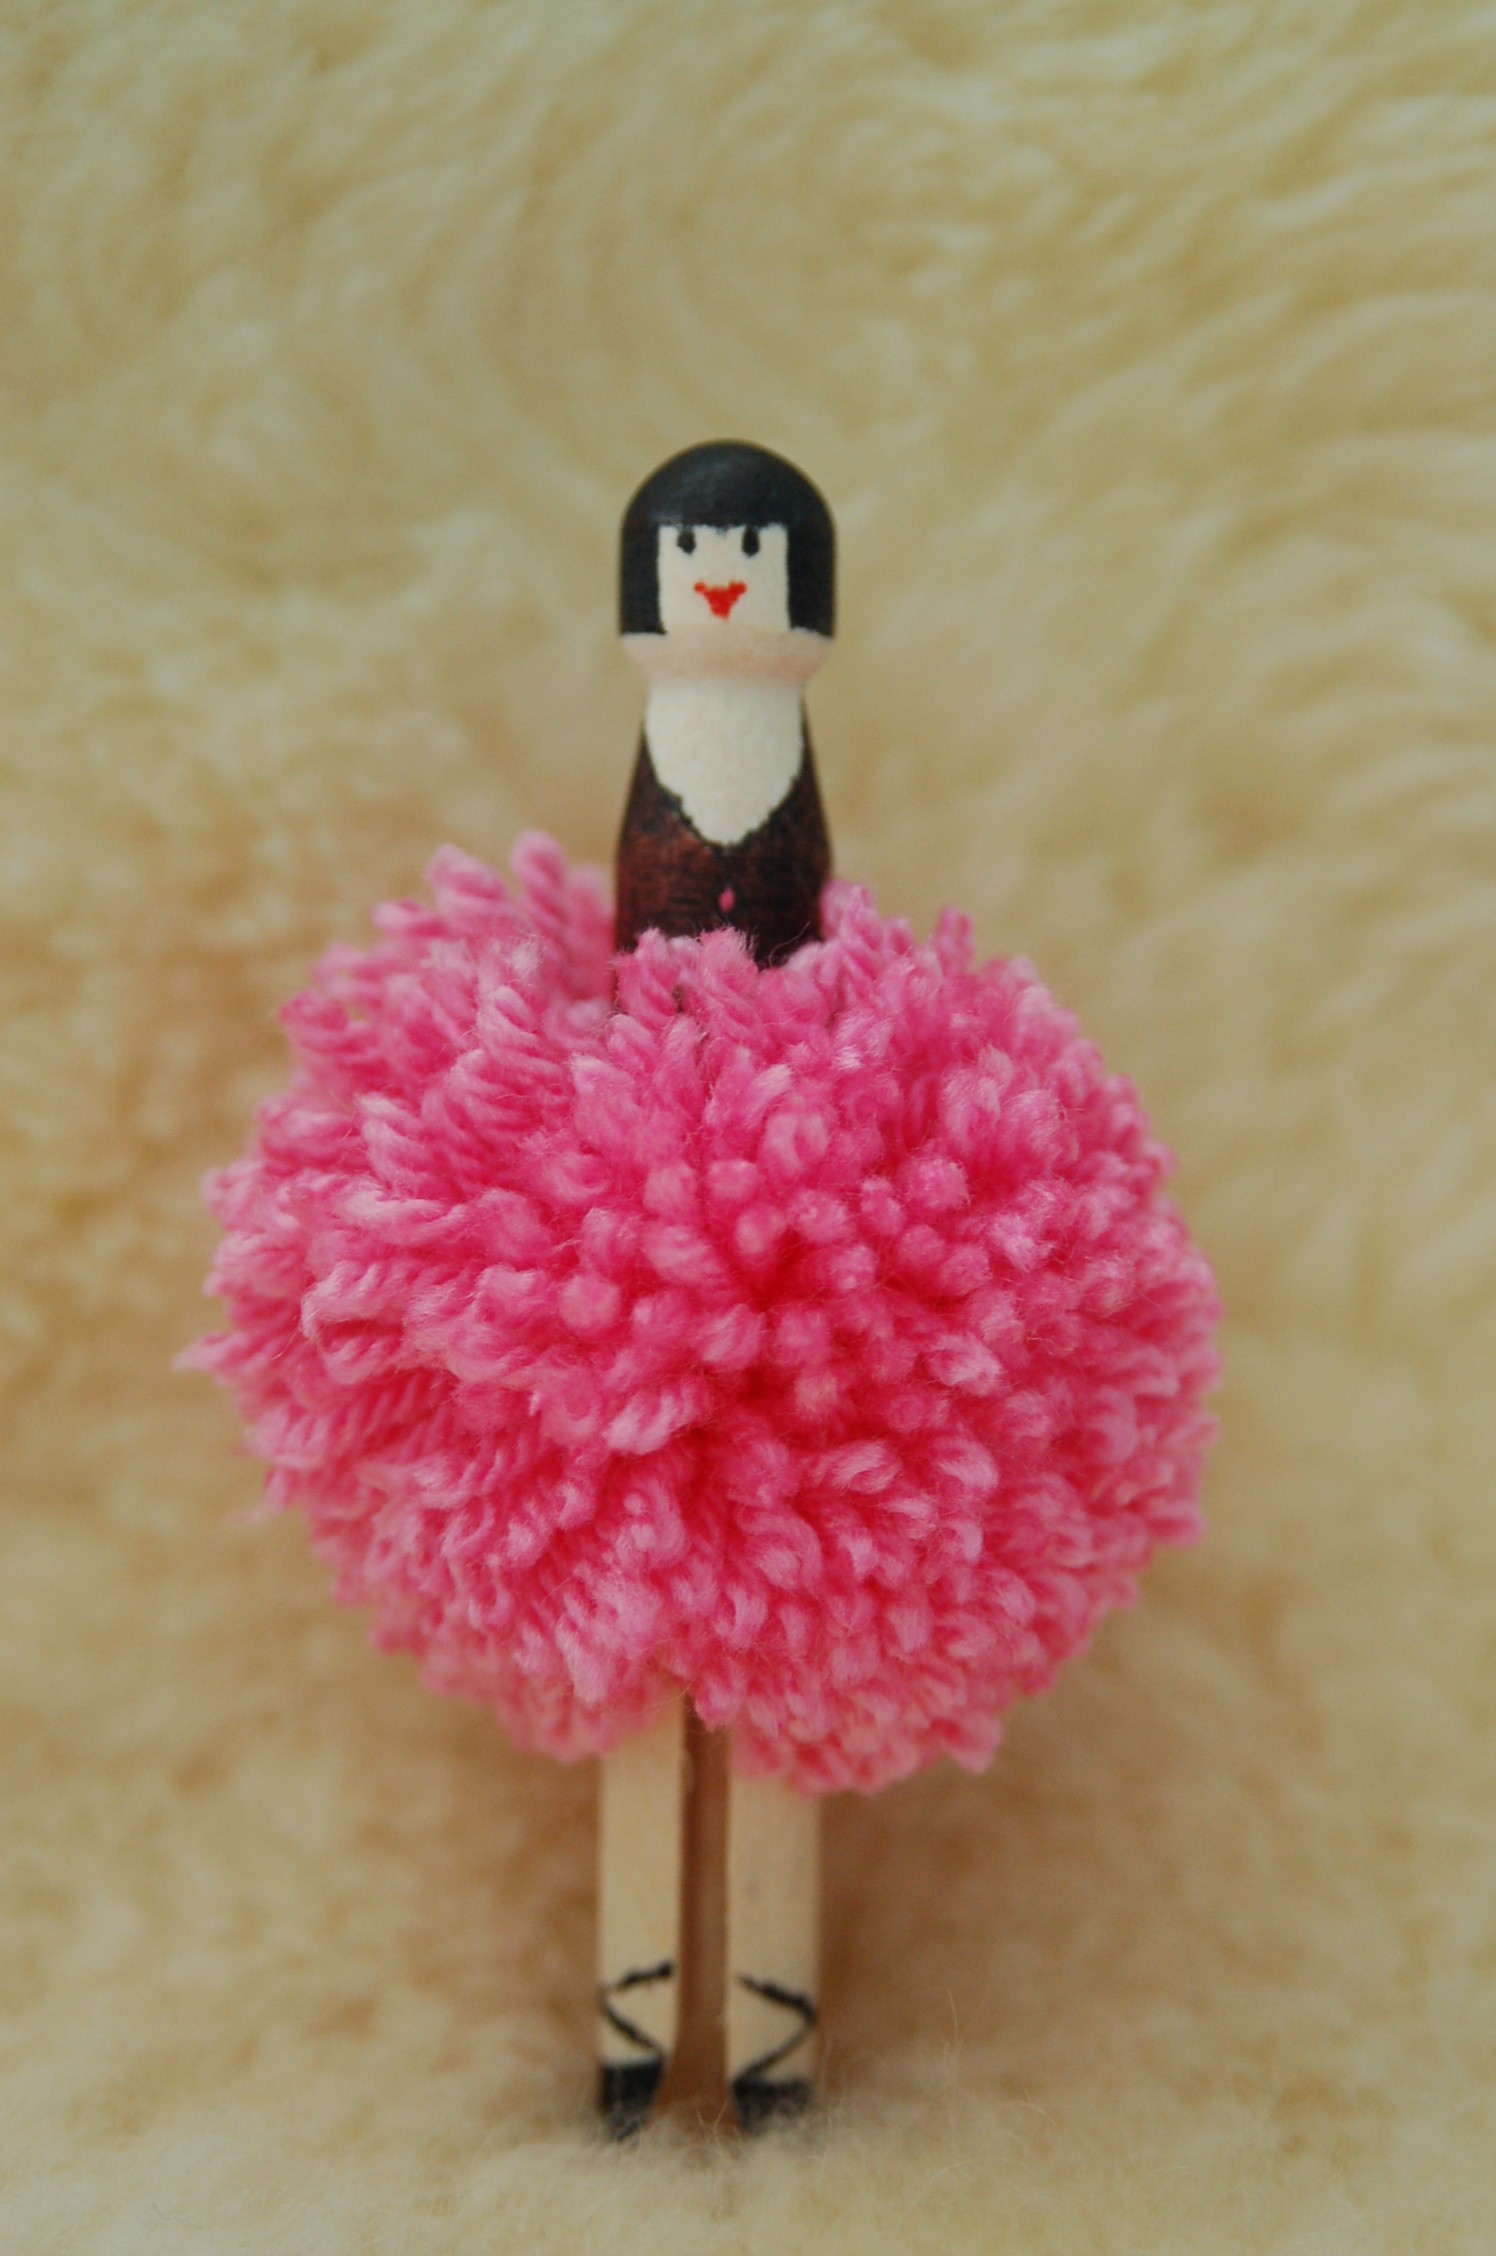
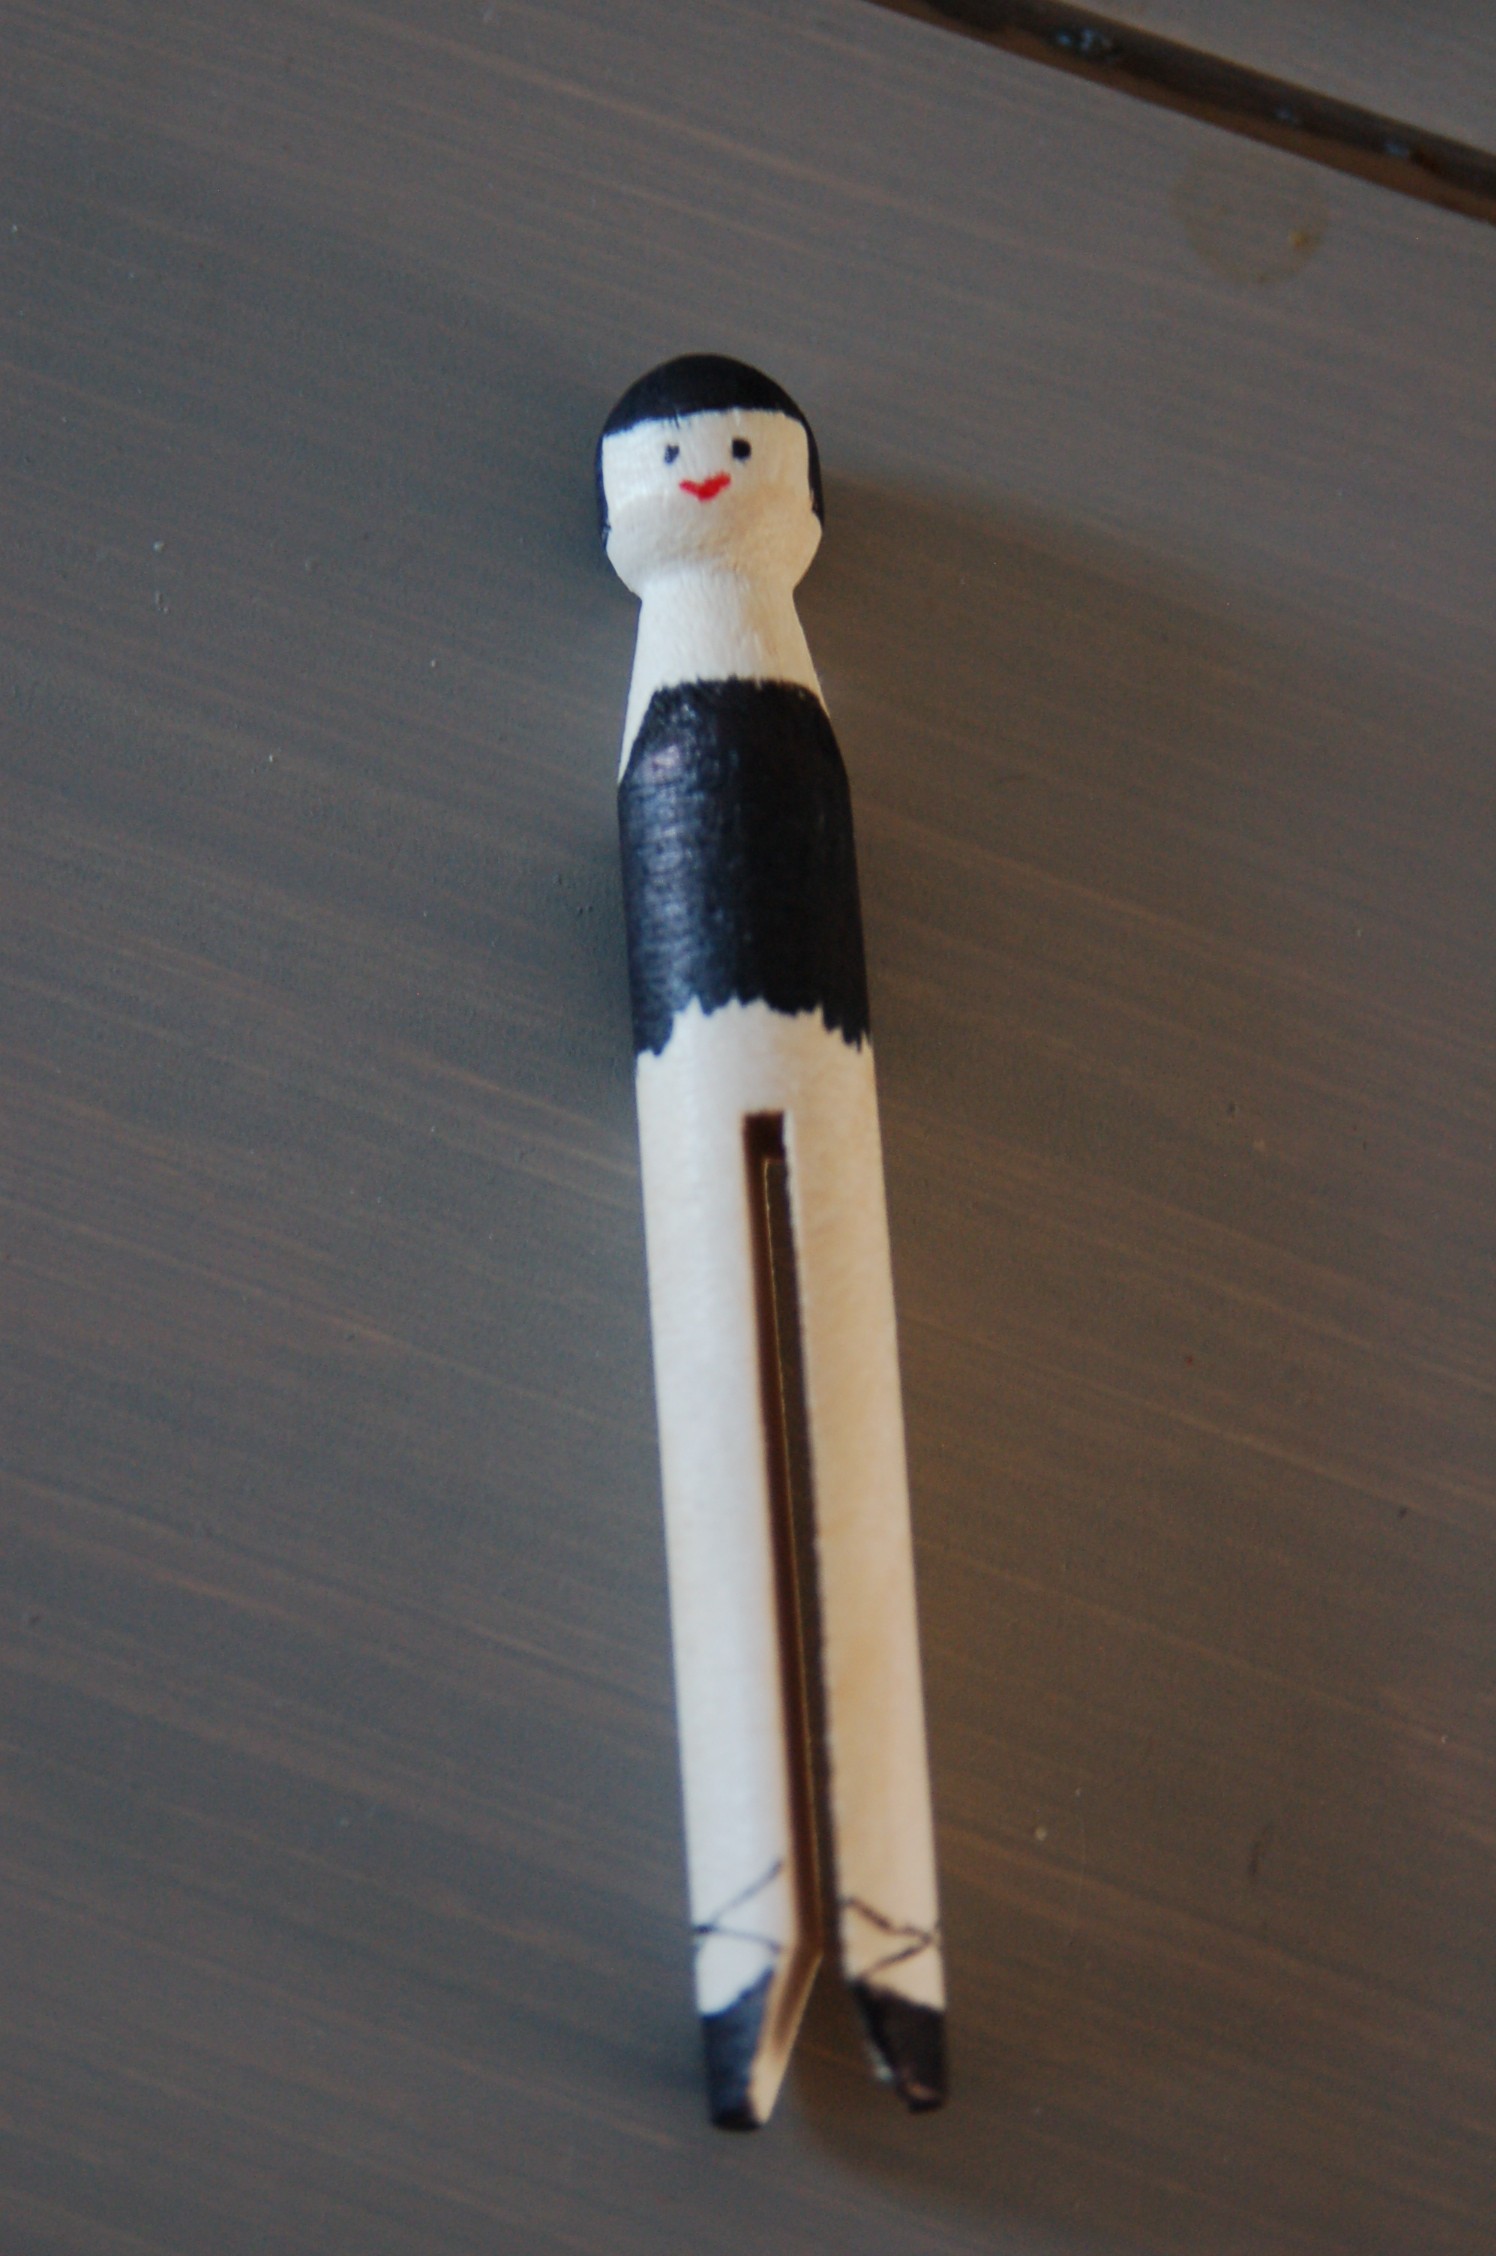
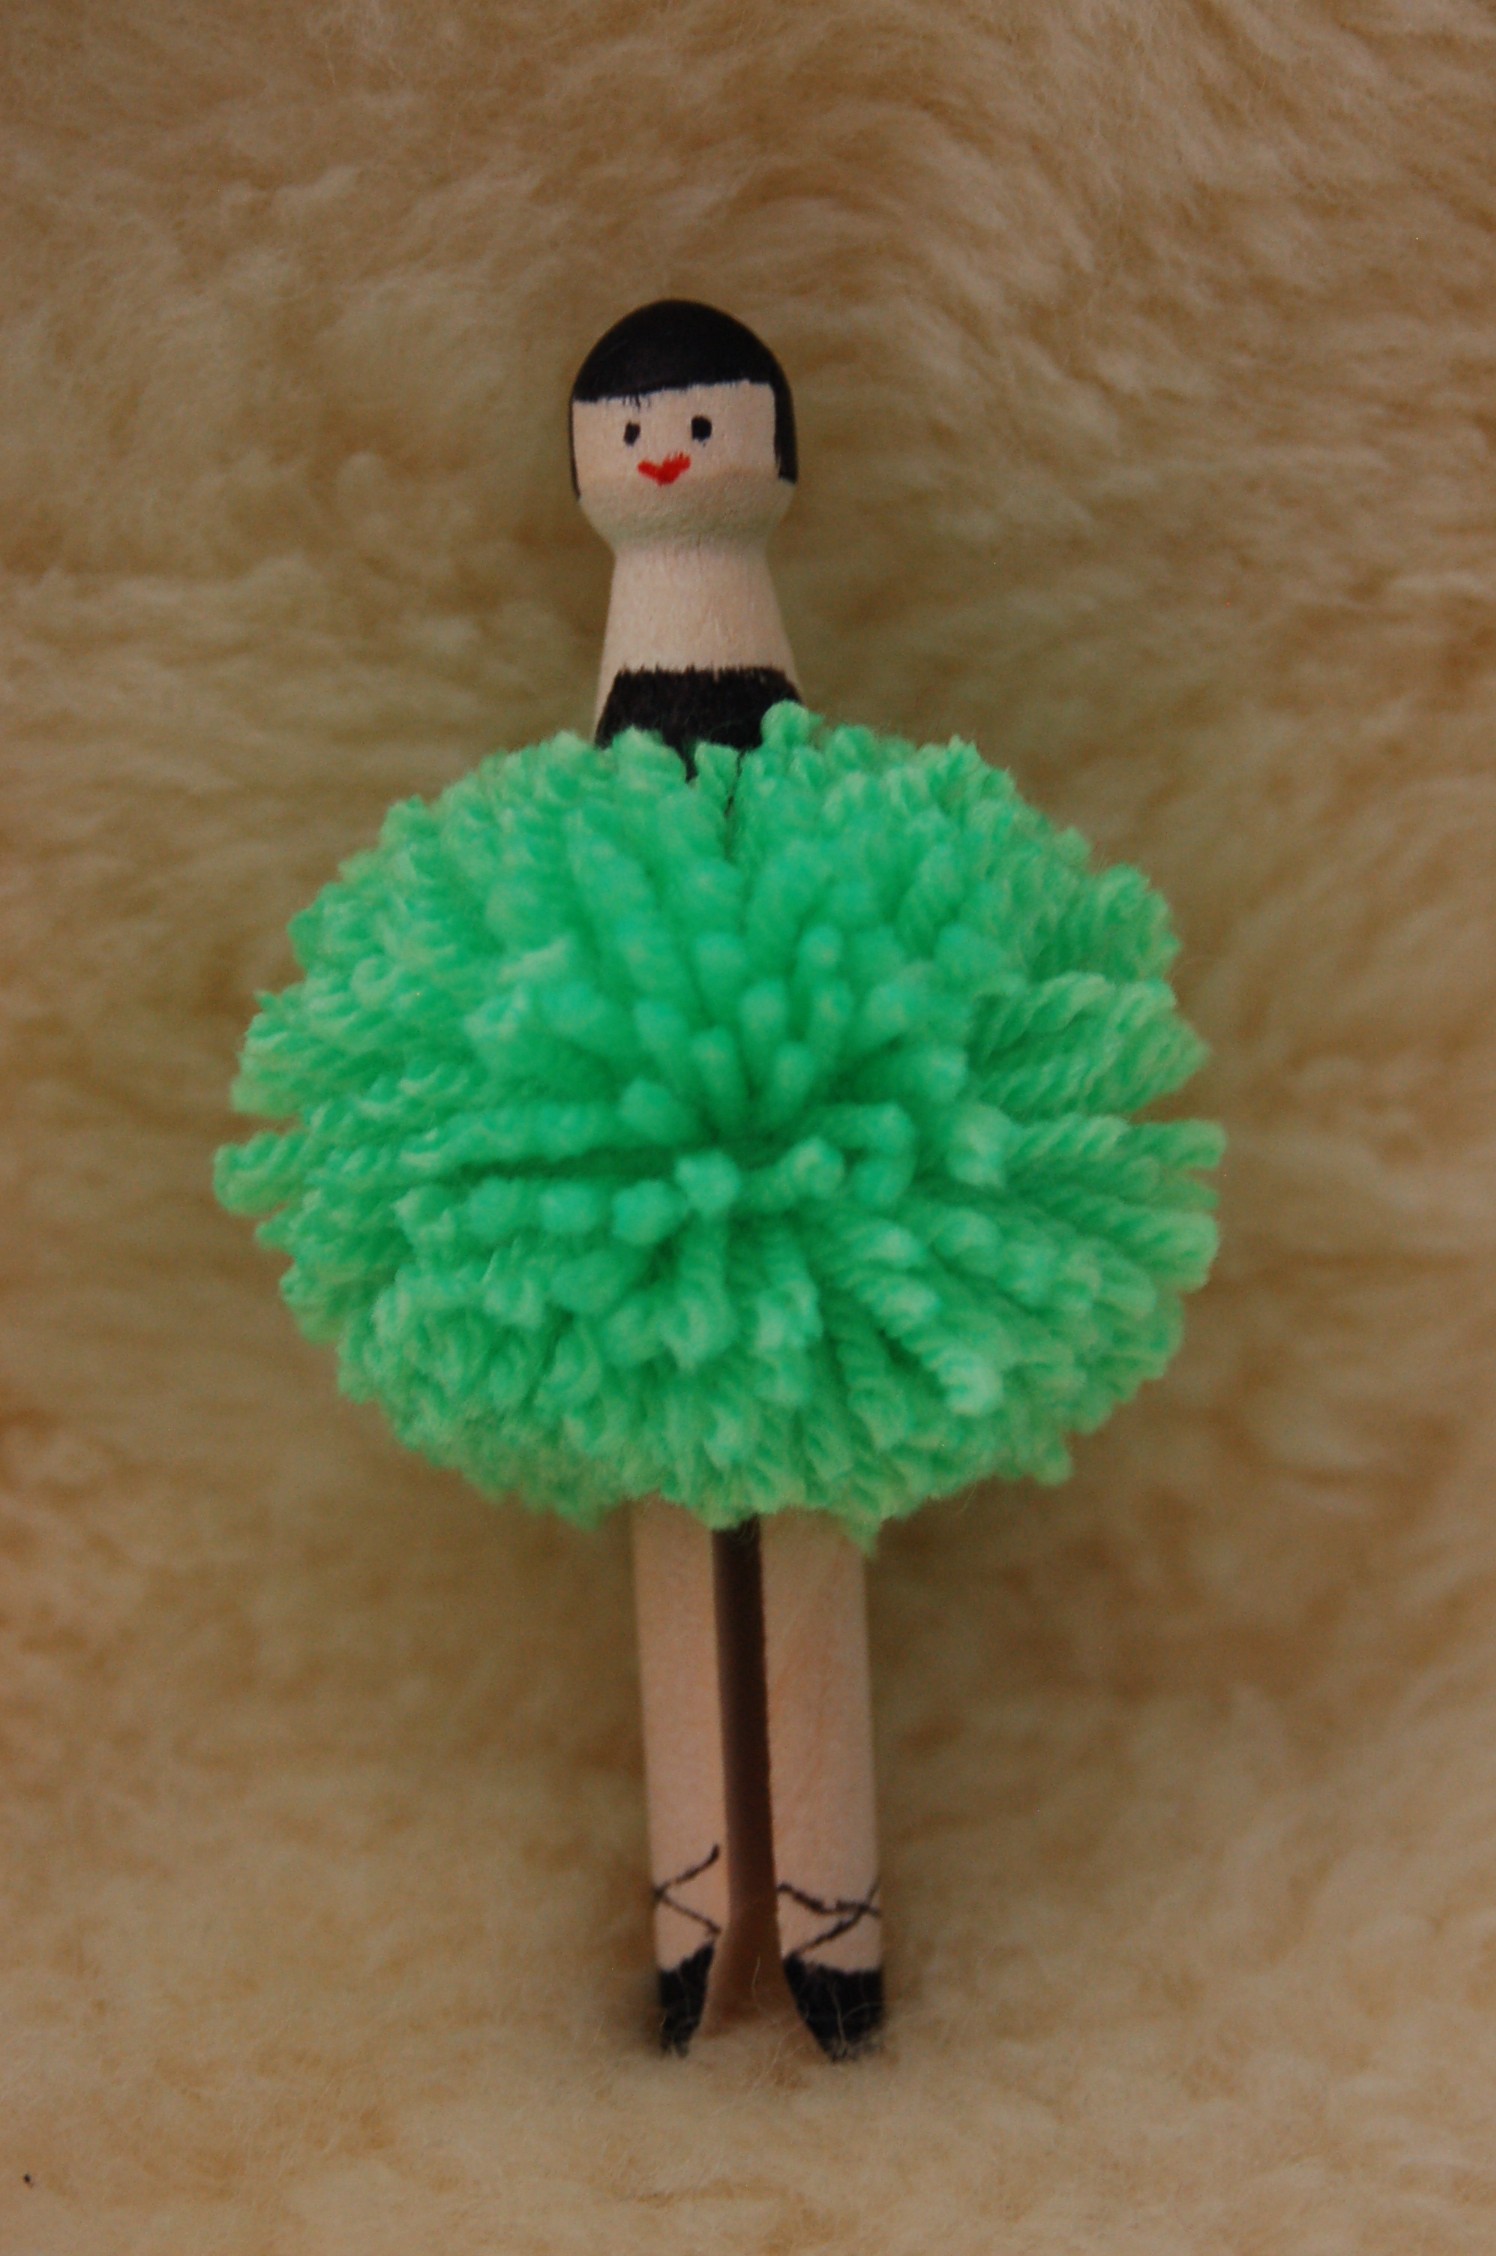
I made this:
And this is how!
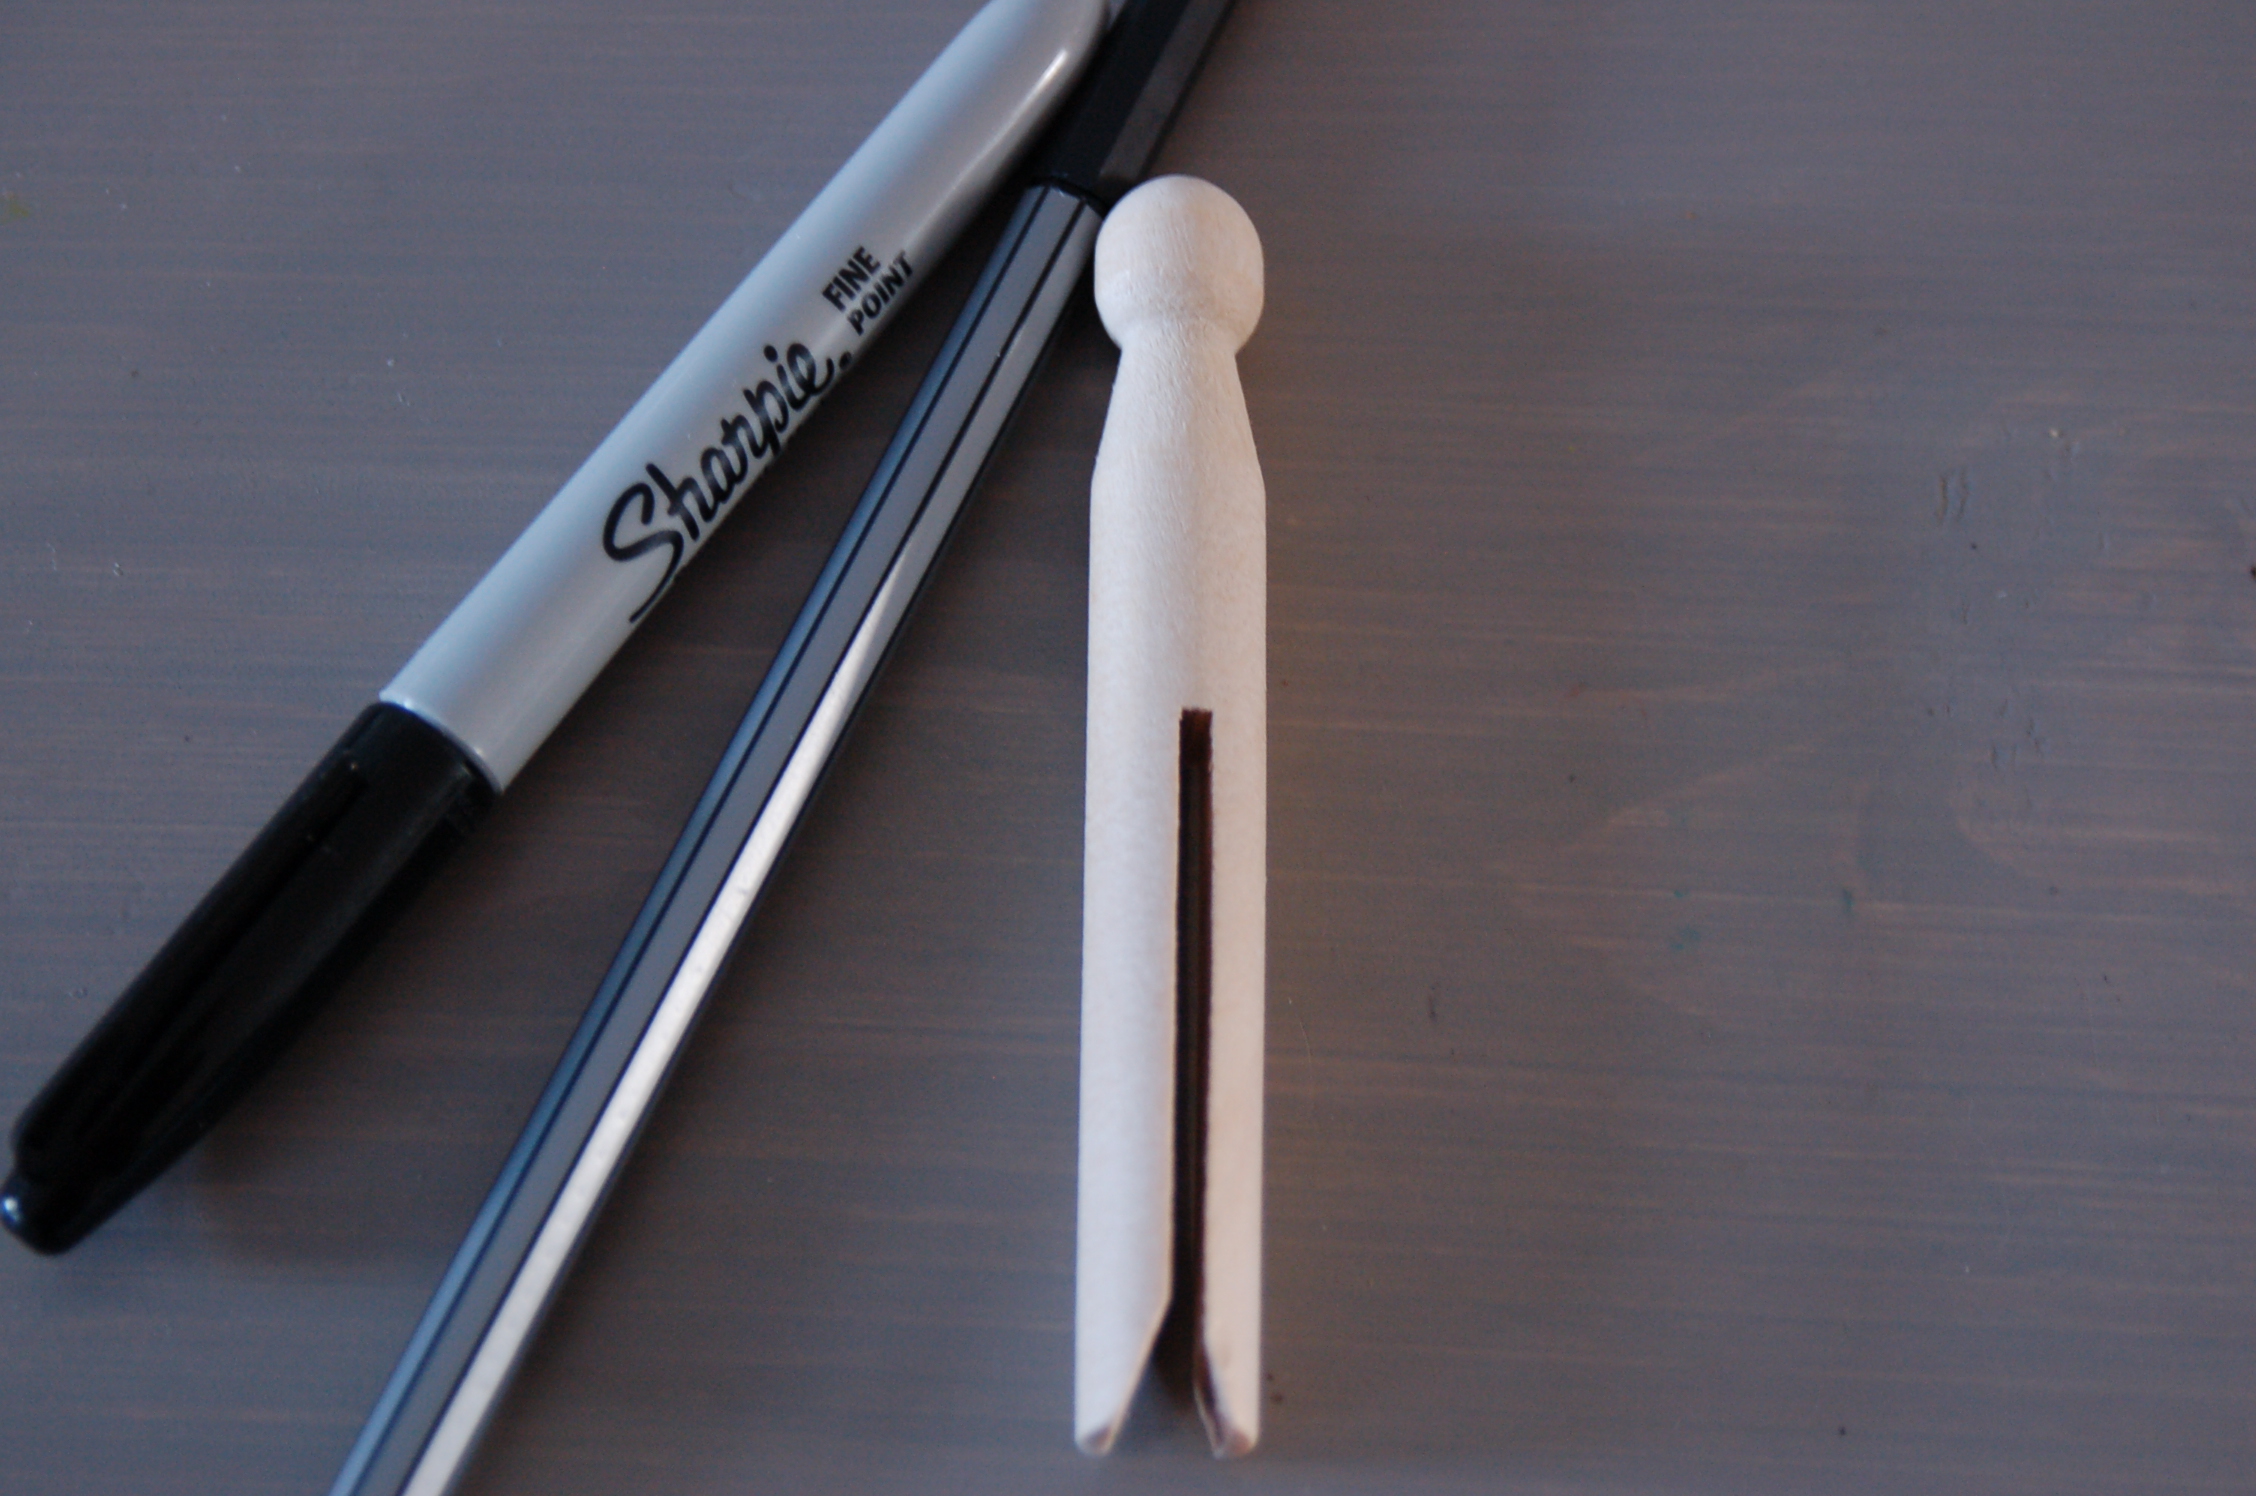
First of all, you would need an old fashioned wooden clothespin, a marker with a very thin point & (for example) a sharpie. Of course you may use any color you desire.
With the thin point marker you make the outlines of the hair, clothes and shoes. Reason behind this is I noticed if you straight away start with the sharpie the ink bleeds and leaves you quite messy contours. For the eyes & lips I also used a thin point marker.
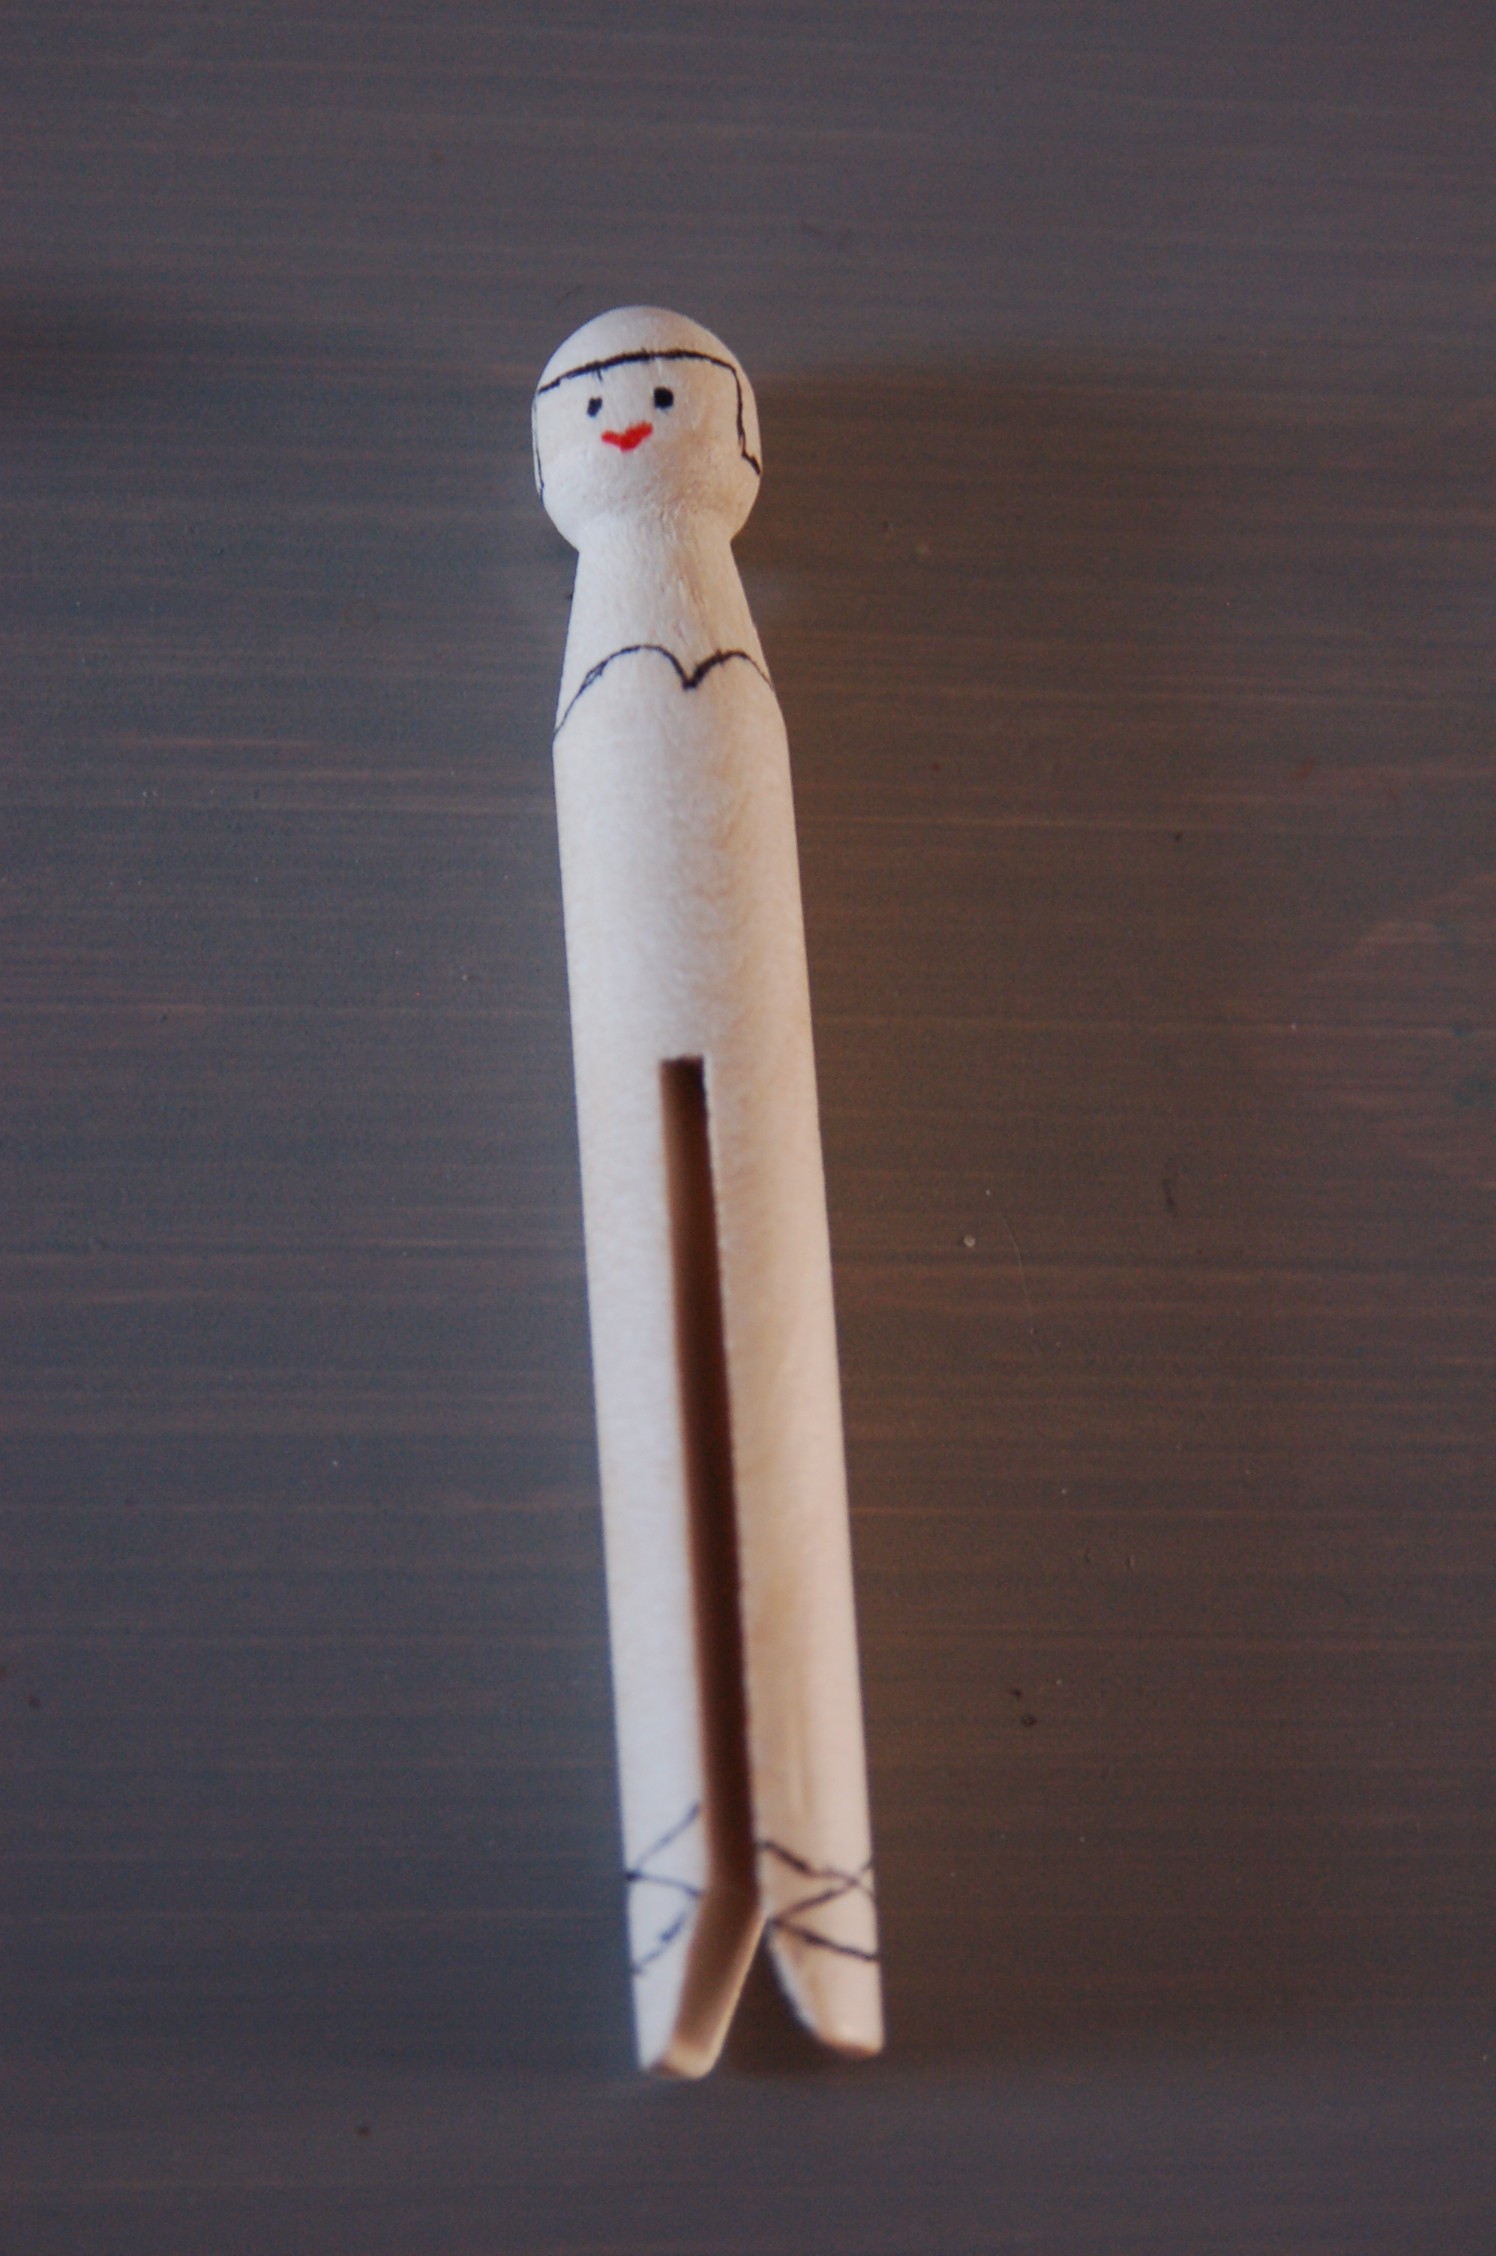
Next step is coloring the parts (i.e. hair, clothes and shoes) with the sharpie. Especially if you make a pompom-tutu there is no need to color the whole body of your ballerina. However, you could also add color for tights, socks, pants, you name it. But do not forget to first make those contours with the thin point marker.
Now the fun part of adding the pompom-tutu (I think I made up a new dictionary word). I used these gadgets I recently discovered which work like a miracle. I remember making the pompoms with two pieces of cardboard, which always were a hassle to pull over all the yarn when you finished cutting.
I believe the pictures speak for themselves.

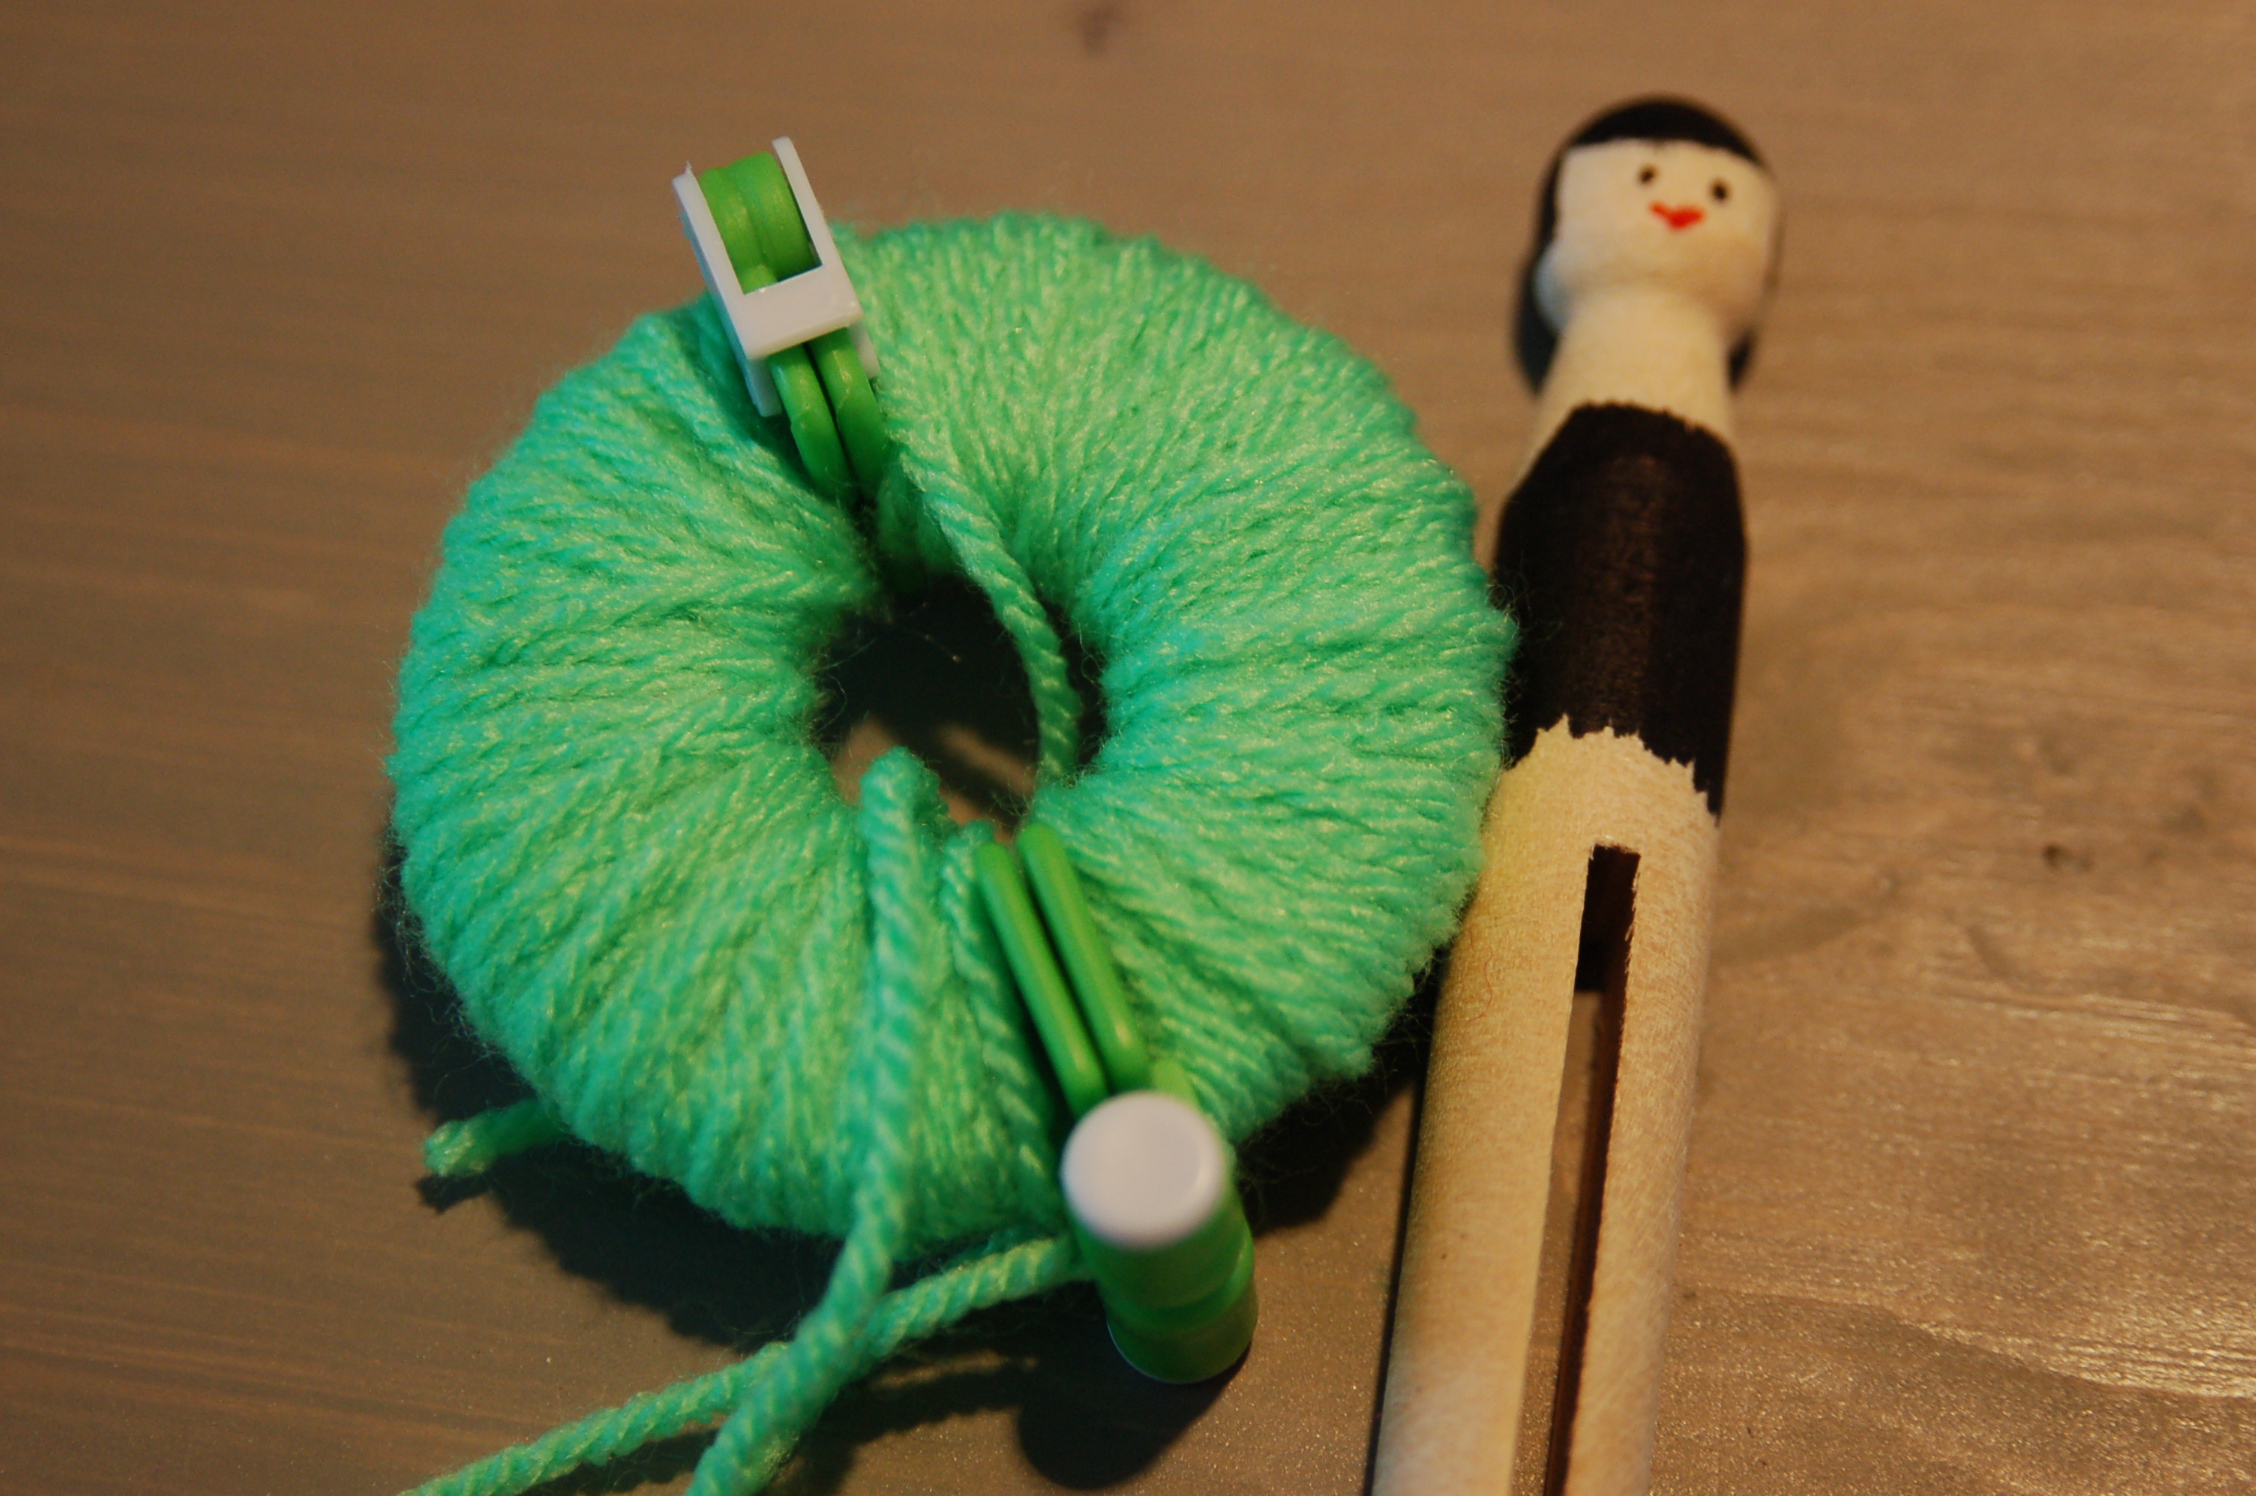
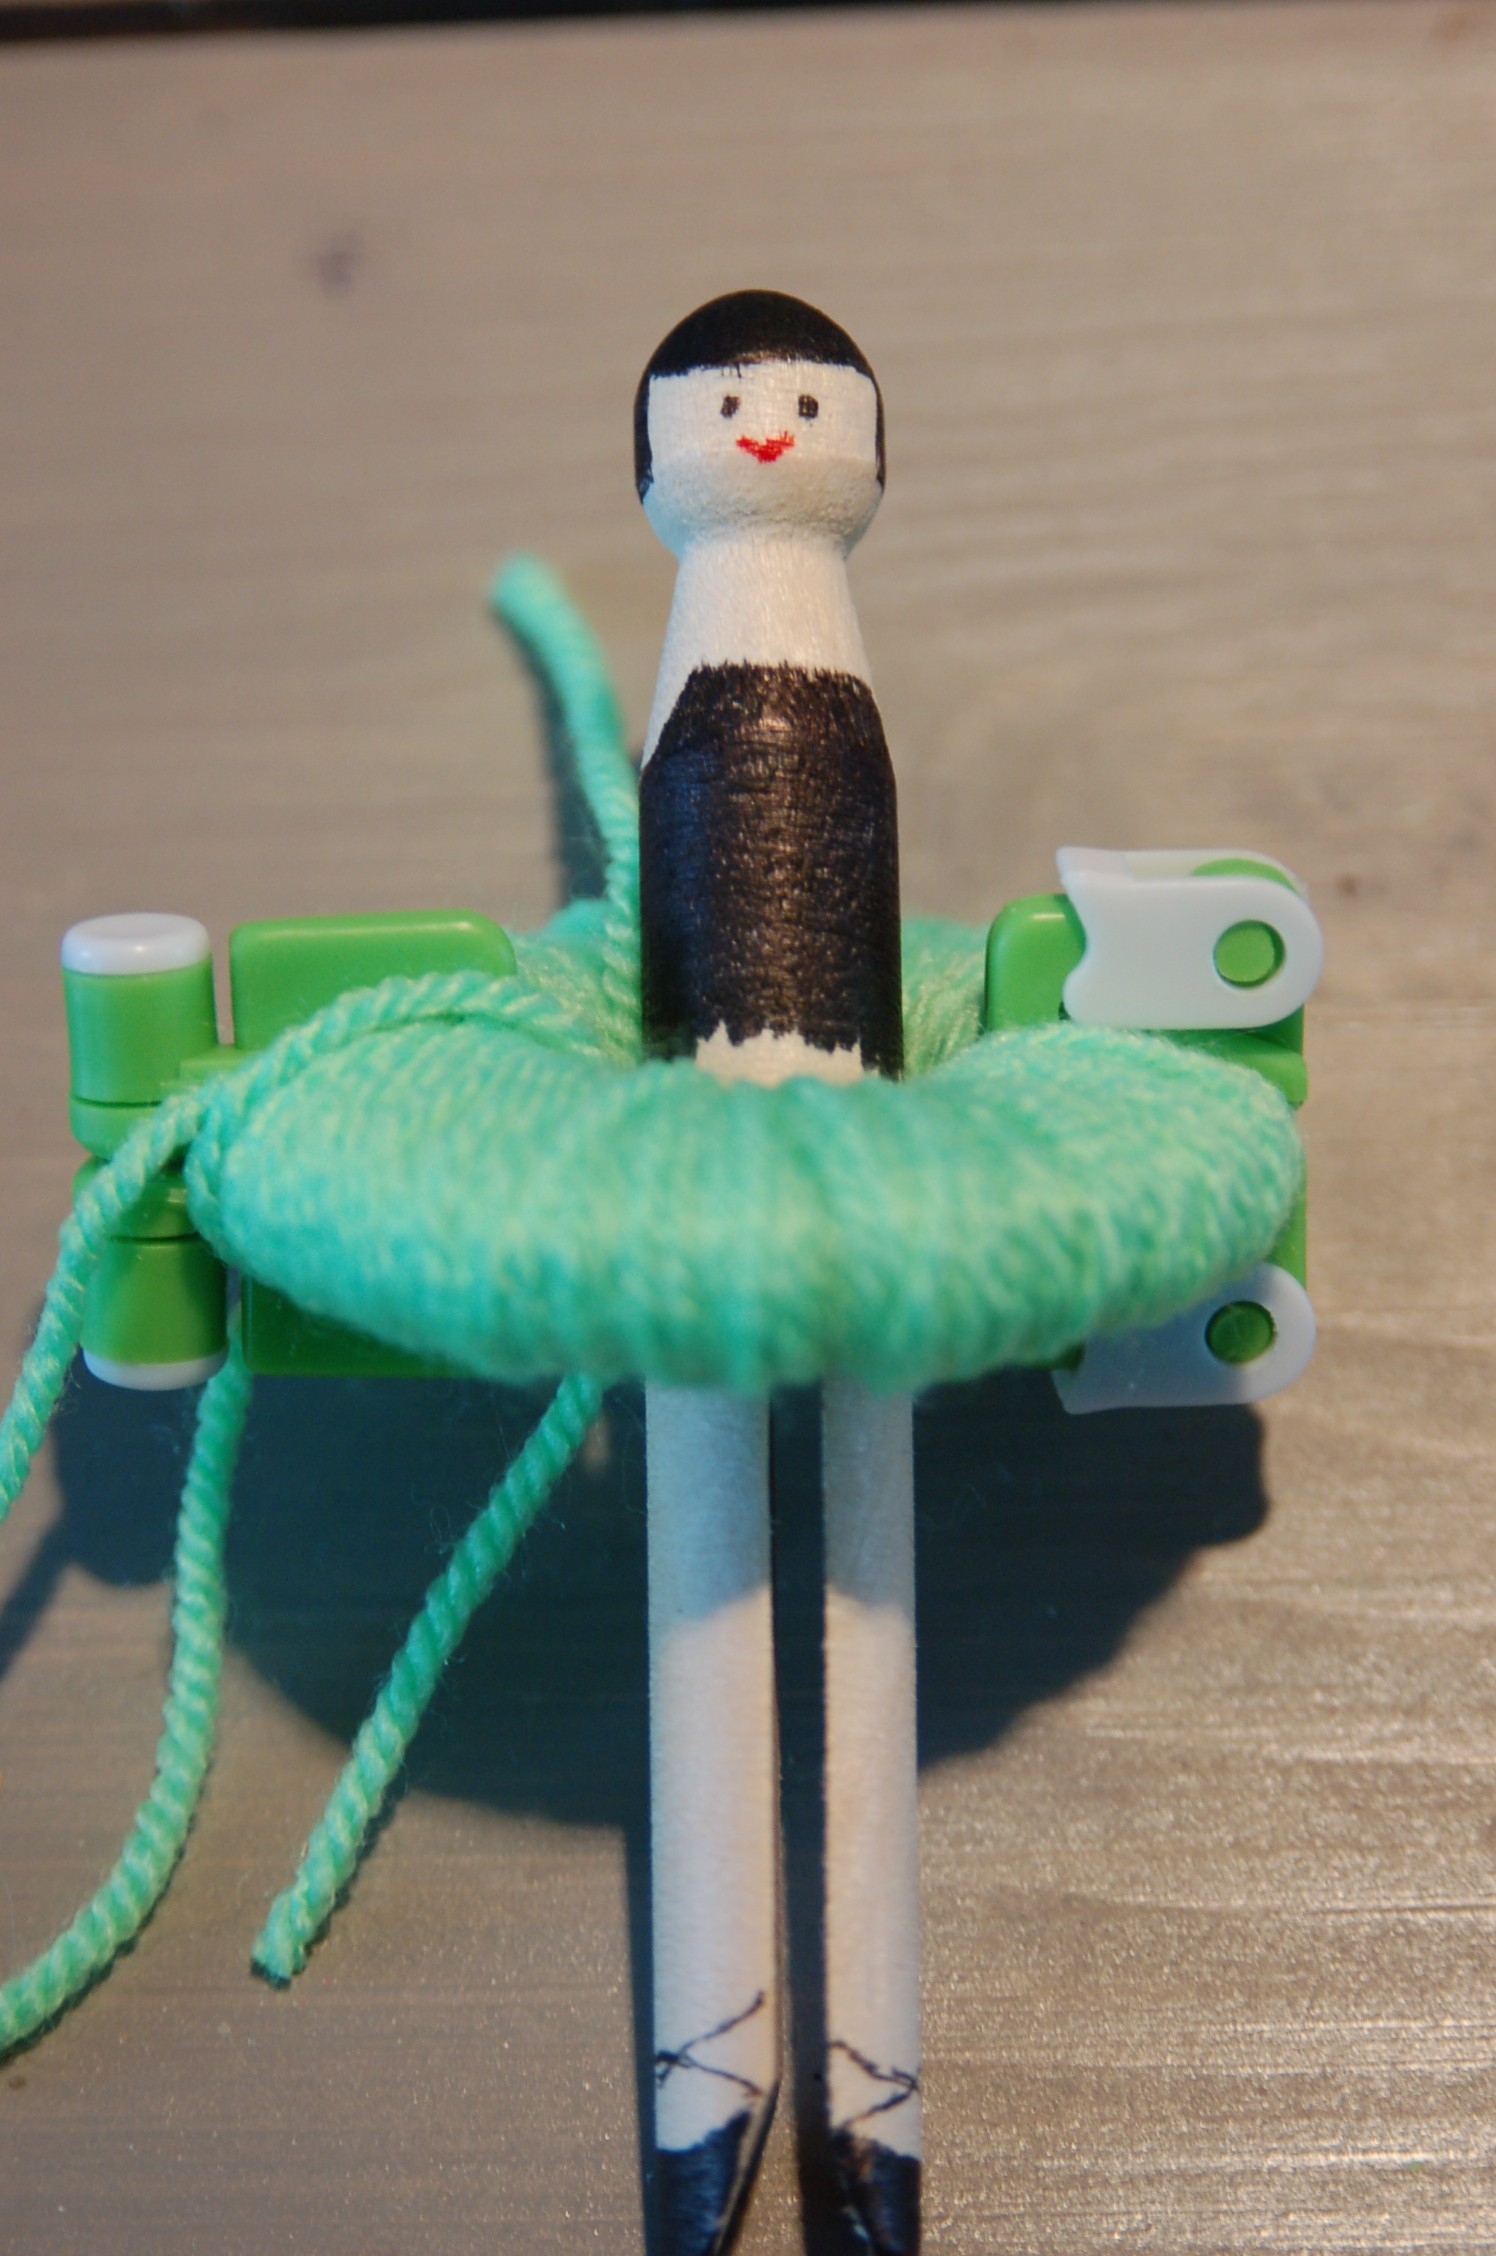
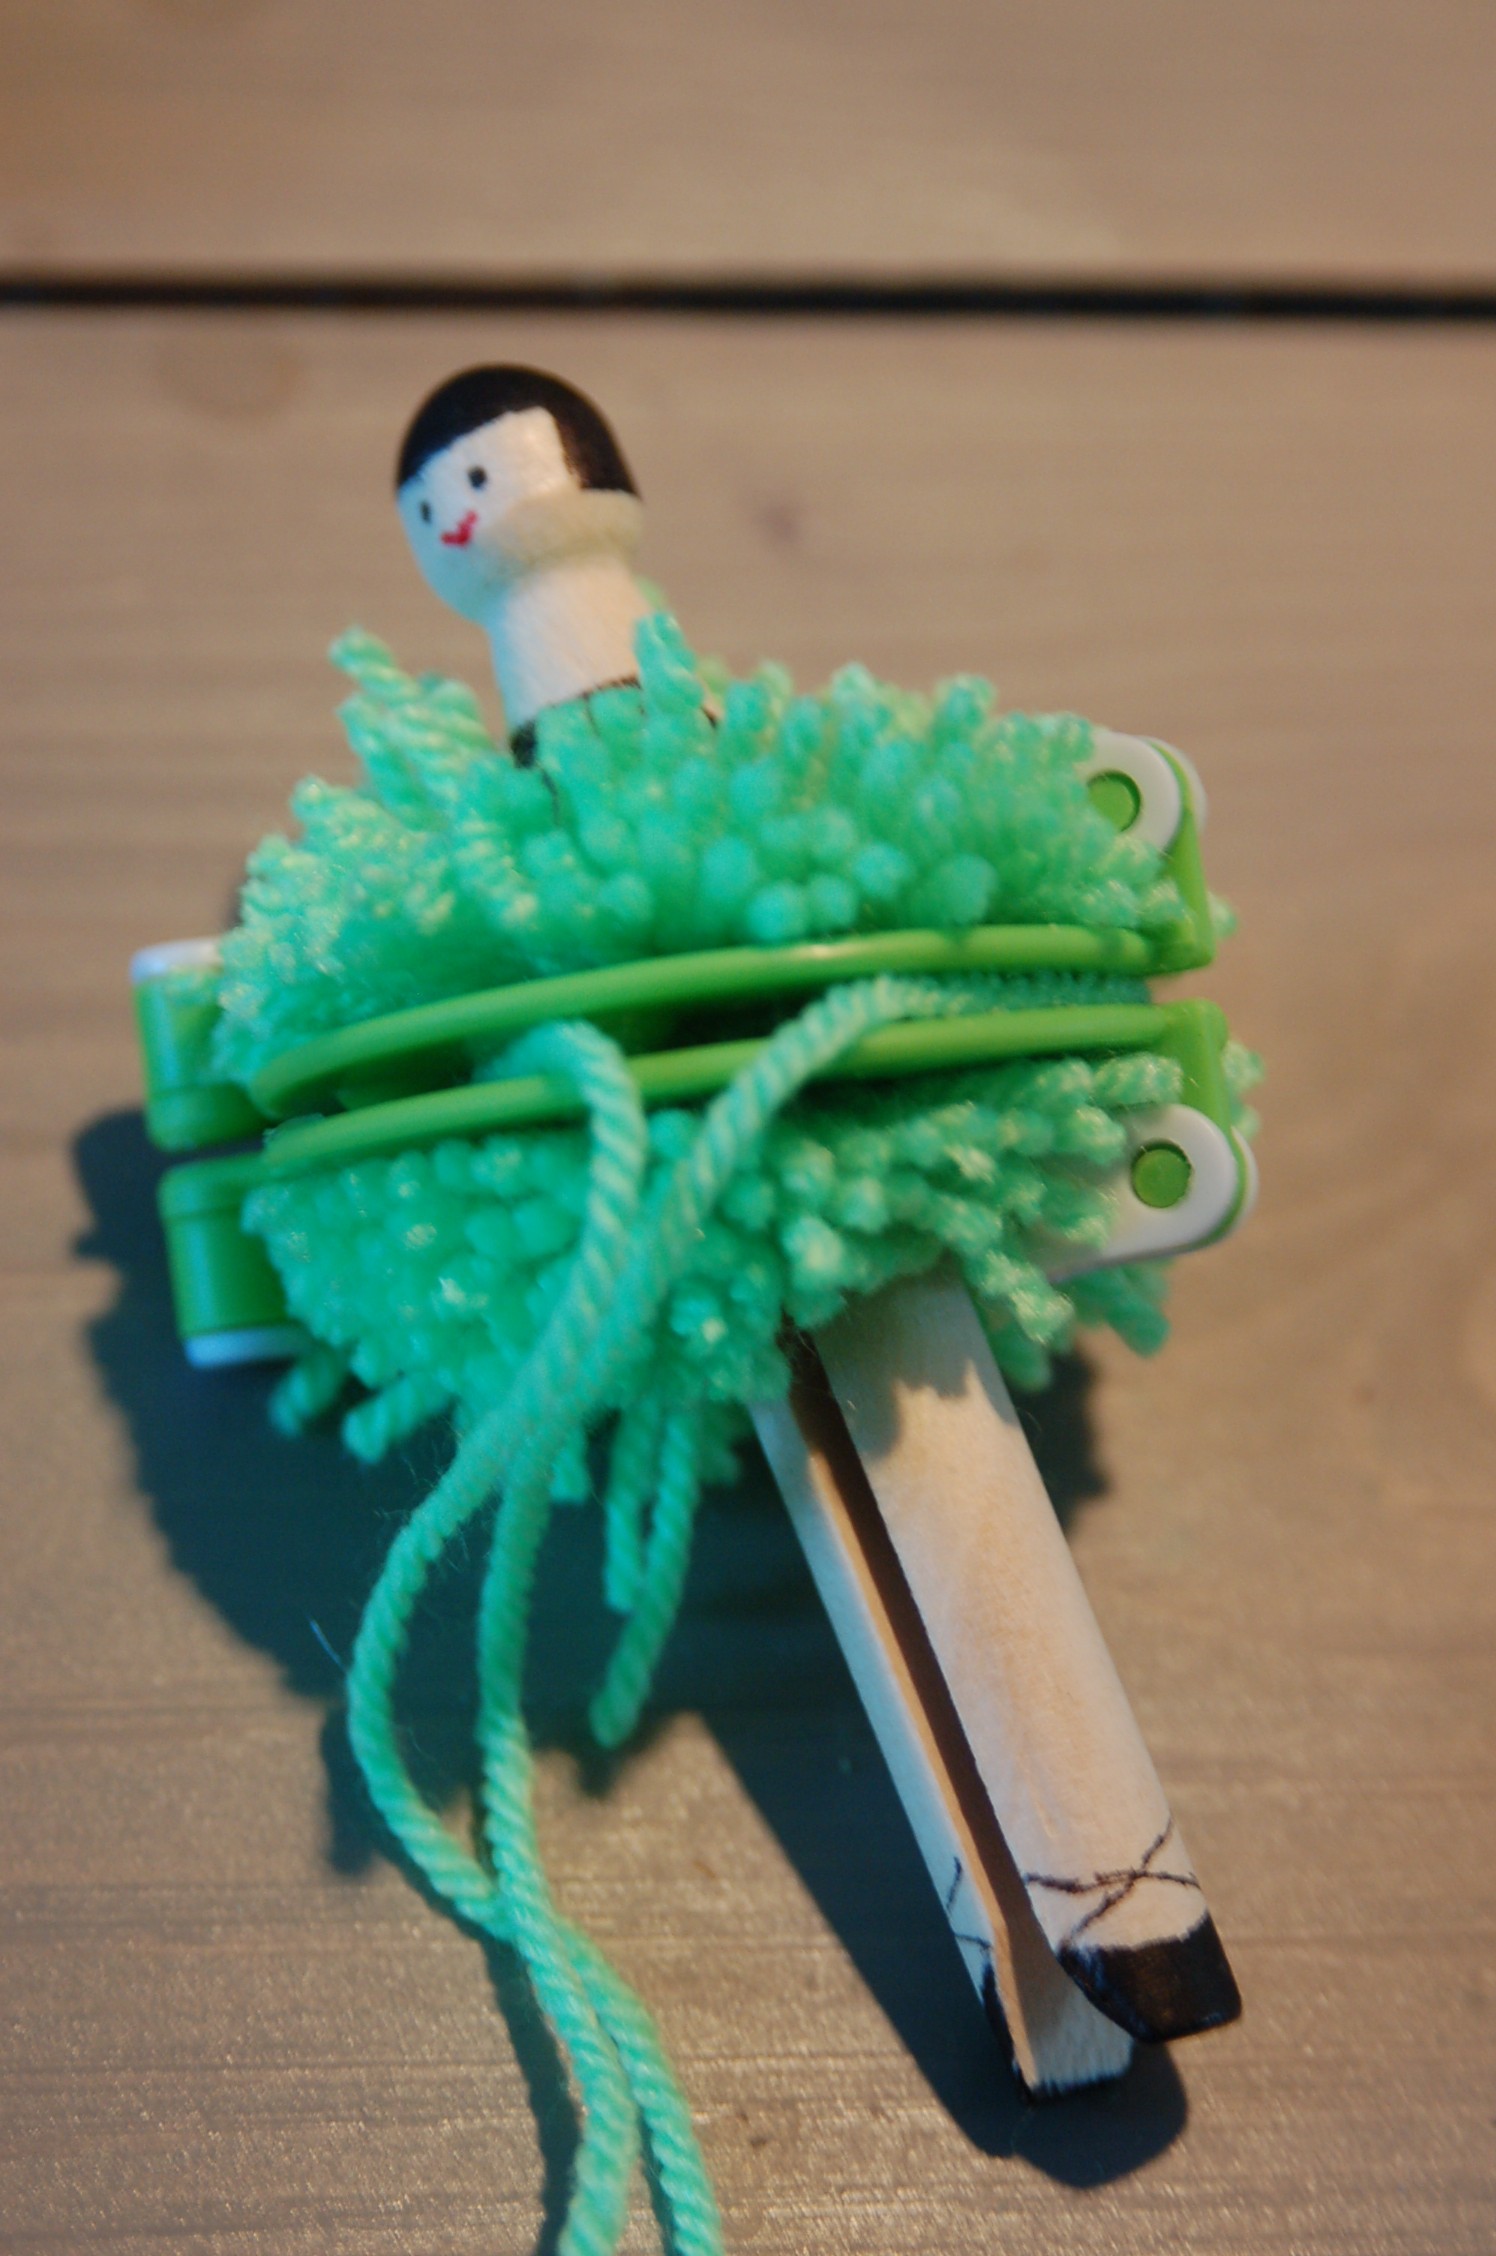
One tip though, when you add the string of yarn to “close” the pompom, only make one knot, than take of the pompom-maker. This way you can make the string of yarn very tight with a second knot around the clothespin.
And there you have it!
Your own pompom ballerina.
ps: If you want a little bit more shine to it, you can always varnish the wood before you add the pompom-tutu.
**********************************************************************************************************************************************************************************************************************
Ik ben een Pinterest-verslaafde!
Meer en meer dingen die ik zie wil ik uitproberen. Sommige mislukken. Andere niet.
Het draait allemaal om het plezier van het reproduceren van wat je ziet.
En in dit geval , zonder tutorial.
Alleen van deze foto :
Maakte ik deze:
En zo doe je dat.
Allereerst heb je een ouderwetse houten wasknijper, een marker met een zeer dunne punt en (bijvoorbeeld) een sharpie nodig. Natuurlijk kun je elke kleur die je wenst gebruiken.
Met de dunne punt marker teken je de contouren van het haar, kleding en schoenen. Reden hiervoor is dat ik merkte dat als je meteen begint met de sharpie de inkt vloeit en je hierdoor hele slordige contouren krijgt. Voor de ogen en lippen gebruikte ik ook een dunne punt marker.
De volgende stap is het kleuren van de onderdelen (zoals haar, kleding en schoenen) met de sharpie. Vooral als je een pompon-tutu maakt is het niet noodzakelijk om het hele lichaam van de ballerina in te kleuren. Je kunt echter ook kleur toe voegen voor panty’s, sokken, broeken, noem maar op. Leef je uit! Maar vergeet niet om eerst de contouren met de dunne punt marker te maken.
Nu het leuke gedeelte van het toevoegen van de pompon-tutu (ik denk dat ik een nieuw woordenboek woord heb gecreëerd). Ik gebruikte een gadget die ik onlangs heb ontdekt, en voor mij heel goed werken. Ik herinner me het maken van de pompons met twee stukken karton, wat altijd een gedoe was om over de net geknipte draden heen te krijgen.
Ik denk dat de foto’s voor zich spreken.
Een tip, als je de draad toe voegt om de pompon te “sluiten”, leg dan maar één knoop. Haal de pompon gadget weg en maak je tweede knoop. Hierdoor sluit je pompon veel beter aan op de houten wasknijper.
Dat was het!
Jouw eigen pompon ballerina.
Ps: Als je een beetje meer glans wilt hebben kun je altijd het hout nog lakken voordat je de pompon maakt.
Ziet er leuk uit!
Wauw! Wat een leuk idee, deze had ik nog niet eens gezien! Erg tof! Ik denk dat Nova dit wel heel leuk vind!
Groetjes!
Sas